Monday, March 23, 2009

Wardrobe Bulimic!

After reading thought provocing posts by Painfully Hip and Charade I quickly diagnosed myself as a true Wardrobe Bulimic as defined by Painfully Hip:


"Wardrobe Bulimic - You consistently have buying binges at thrift stores and discount clothing joints. You have perhaps 10 things in your closet you’ve owned for more than 5 years. Your style changes as often as your underpants. Your most inspired outfit is the one you just bought."

Even though I know it it's not rational, I do feel like I won't have anything to wear and will look so dated without those studded gladiator sandals, a jumpsuit, an oversized blazer or whatever it is I'm currently obsessing about. But when I have actually purchased my latest must have item I too often either

a) don't have the guts to wear it, fearing everyone will look at me funnily
example: oversized blazer with rolled up sleeves I HAD to have


(this one is by Topshop)


b) can't get it to work with anything in else in my wardrobe
example: studded belts - couldn't get the first one to work so bought another one. Where's the logic?!?


(This one is by Topshop)

c) I very seldom go out and the item's too flashy to wear day-to-day
example: studded Gucci knockoff Go Jane studded gladiator sandals - I can barely walk in such high stiletto heels!


d) or I am in a helping out in the warehouse phase at work thus wearing old duds so I won't ruin the new whatever it is on the first day.
example: white cotton tee I copied the Marc by Marc Jacobs Jeepers Peepers design on to with permanent marker (image of the original from Net-a-Porter).


It's not that I don't have anything to wear - it's more a lack of occasions. My lifestyle is not as glamorous as my wardrobe wishes for. And when I do go out I'm afraid I look like I'm trying to hard. I have so many ideas on what to wear, but to actually get it to work without looking fashion desperate? Very hard.

So it has dawned on my again that I need to get off the fashion rollercoster and concentrate on getting a wardrobe that works for my lifestyle while looking stylish at the same time. I need to figure out what flatters my shape and invest in quality items that are versatile and that I can get a lot of wear from. It's not the first time I've come to realize this but it's too easy getting swept away by all the ingenious outfits I want to have too seen in various fashion blogs.

This is not possible when I'm constantly on the border of being broke from my last binge at H&M's. I pay my bills but I see that my shopping habit is getting in the way of fulfilling my dreams. I currently have no financial buffer to fall back on. I am paying off the mortage on my apartment and I'm eating whatever I feel like without thinking of the cost. If I try to save up I last for about two weeks, resulting in a major binge at some cheap high street store, spending more than I actually managed to save up. And I eat out too often.

I need a strategy - I need a plan.

How can I feel stylish while being in better control of my economy? My dream is to travel around the world for 4 - 6 months but to do that I need to save up not only the cost of the journey, but also enough to pay for my mortage and student loan while being away. I'm starting a new job in May so this trip is at least 2-3 years down the line. I also need to have a buffer so I'm not completely broke when coming back.

In other words, I need to start saving up some serious funds without feeling like I'm starving my taste for the good life.

This is the background for starting the Recession Style blog. I wish to create a place you can go to find tips on how to spend less yet still feel like you're a part of the world. I'm hoping this blog will serve as an inspiration for myself to keep focus without losing my inspiration. And that we can help eachother.

Any tips or advice is highly appreciated!

Sunday, January 18, 2009

Summer 2009 Make Up Trend: Radiant, Natural skin - with what you already have

An easy and free way to get the perfect, natural looking and radiant skin seen on the runways for Summer 2009 is to blend your foundation with your moisturizer. You can either make a bigger batch and keep it in an air tight container for easy access in the mornings (like I have) or mix what you need in the palm of your hand. If you have the mixture readymade you can adjust the colour as your skin tans throughout spring by adding more foundation.


I've tried this for a week now and have found that it works amazingly well. My skin tone is more even and it mutes imperfections while looking like you don't have make up on. The colour really melts into the skin due to the moisturizer and it lasts all day. The moisturizer also lightens the foundations a few shades so this is also a way to make use of a foundation that's a little dark for you. Last summer's foundation can work for you before you've got the tan required.


How did it work for you? You can let me know here or leave a comment.

Tuesday, January 13, 2009

Cheap Movie Night

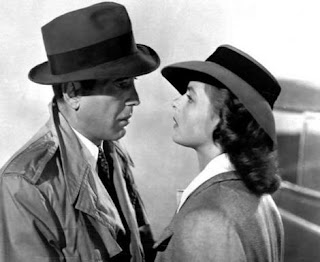
Photo from Casablanca


There's no reason not to be social even though you're saving your cash. Actually, when saving it's even more important to be around friends and family to avoid depression. It will get your mind off your financial situation and distract you from the fact that you can't buy whatever you like. Here's how you can have a great movie experience at a very low cost. All it requires is a little planning.


Start out with reading the TV guide - preferably online. Find a movie you'd like to see that starts at a reasonable time and that you think your friends or family would enjoy too. Invite people over for a movie night. People love this sort of stuff and often they'll ask if they should bring anything. Seize the opportunity and ask them to bring soft drinks or maybe a little beer if you're that kind of a crowd. The second person to ask you can ask to bring some snacks.


The plan is starting to form. Next step is to take 0,3 liters / 1/2 pint / 1,3 cups of olive oil if you have it - it has to be extra virgin, I'm afraid. Put a few red chillies in there, either chopped fresh ones or dried ones. Leave it in an airtight container until your movie night. I'll get back to what it's for later!


So what are you going to serve? You need to serve something now that your friend's are bringing drinks and snacks! Fear not! Pizza is the perfect Movie Food - and it doesn't have to cost much. Your friends and family will love this home made Margherita! And this is how you make it - the recipe is very detailed so people with little cooking experience can do it too:


Pizza Margherita (for 4 people):


50 grams / 2 oz fresh yeast or 1 satchel of dry yeast
0,4 liters / just under 3/4 pint / 1,5 cups of water
2 tablespoons of vegetable oil
1 liter / 1,5 pints / just under 4 cups of flour
1 teaspoon of salt
1 jar of tomato puree
3 - 3 fresh mozzarella cheese or other yellow hard cheese (Mozarella gives the best result)
Basil - preferably fresh but dried will do
Salt and pepper


This what you do:


Stir the yeast into the water you have brought to body temperature. If you're using dry yeast use slightly warmer water and leave the mixture to rest for 10 minutes. Mix the rest of the ingredients in and work the dough well until it's smooth. Cover the bowl with plastic and let it rise for 30 to 40 minutes. Not too cold as that will kill the yeast and leave your dough a disaster. Too warm can do the same.


Preheat the oven to 220 degrees Celcius / 425 degrees Fahrenheit / Gas 7. Dust the working surface with flour and remove the dough from the bowl. Roll it into 8 thin discs or 4 thin squares. If you don't have a rolling pin an empty wine bottle will suffice. Just remember to wash it properly first. Put baking paper and 2 discs or 1 square on your oven tray. It can be a good idea to transfer the dough to the tray before you're finished rolling it and then roll it thin and nice on the tray. Let the bases rise for 8 - 10 minutes. Meanwhile smear a layer of tomato puree on the bases and tear the mozzarella on top - or grate cheese over. Sprinkle torn basil leaves or dried basil and salt and pepper on top. Bake for 10 minutes or until the crust is tanned and the cheese starts turning brown.


Now the finishing touch - your "secret ingredient" so to say. It won't be secret for long though as you're putting it on the table - the olive oil you put red chillies in a couple of days ago. Taste it before your guests arrive. It's supposed to be a little hot so you can either put in more oil or some dried chilli until your happy with it. This makes your margherita into something special and glamorous. The chilli flavoured olive oil I first tasted in Milan so it is an actual Italian custom to let your guests drizzle it over their pizza - one slice at a time. Encourage them to try it! the pizza can be a little bland without it so I really recommend it. You can buy finished chilli flavoured olive oil but it's not that easy to come across. And the point is not spending more than you absolutely need to, right?


The last thing you need to make a movie night perfect is popcorn. Buy the pop at home variety - loads of popcorn for your money. The microwave variety is more expensive than the casserole one. The casserole type isn't hard to make either. Wait for a commercial break. Heat some butter in a big casserole and drop 3 popcorns in there. Don't forget the lid! Turn the heat up high and wait for the corns to pop! When they do, pour in a cup of popcorn, put the lid back on and shake the whole thing. Turn the heat down a little. Shake it a couple of more times to avoid it burning. Soon it'l be popping and popping. Salt it and serve it warm in big bowls.


Tell me how it went!

Monday, January 12, 2009

How to do the Summer 2009 Daytime Smokey Pastel Eye - with whats already in your make up bag


Here's how I do the Daytime Pastel Smokey Eye. This look is a muted version suited well for for going out into the revealing bright light and looks fresh and healthy. Purple is one of the hottest eye make up colour for summer 2009 so I've chosen to use the pastel purple I created. In my last post you saw how you can create your Summer 2009 pastel eye shades from what's already in your make up bag. Use what you have - you don't need a liquid eye liner if you don't have it.
Just be careful with other people's eye make up. Don't borrow eye make up or let other people borrow yours. If they have an eye infection brewing the make up will transfer it to you. Also throw away the eye make up you wore when an eye infection started (if you've had one) as the bacteria may live in the make up and re-infect your eyes.


First, I applied a neutral base all the way up to the eye brow. Blend with a brush.


Then I applied the pastel purple shade to the lid up into the globe line. This is the shade I created for free. Also apply it under the lower lashes, from the middle to the outer corner. If you want a more intense look do the lower line with the darker purple instead. Blend.


Next, I put the darker purple in the globe line and a little higher than that on the outer half. Blend well again.


Time for eye liner. I use a liquid liner. I have to smudge it well using cotton tips. I also put a little white eye shade on the inner corner of my eye.


Then I apply dark brown mascara as I've got a light skin tone. This is an everyday version of the pastel smokey eye. I'll make a post on how to create the Pastel Smokey Eye for Nighttime a little later.
Do you have another method for creating the smokey eye? Leave a comment or send me an email!

How to get Summer 2009 eye shades for free!


One of the big trends in eye make up for summer 2009 is the smokey pastel eye. Pastel is a huge trend with many of the big make up brands. Make up in general for this season is going toward a lighter, feminine look with radiant skin being the most important aspect of it. I'll give you a tip later on how you can create the see through base that covers a bit but lets your skin glow naturally through it - from what you already have in your make up bag!


To create the pastel colours for Summer 2009 too you only need what's already in your make up stash. We learned at an early age that if you mix a bright colour with white or a light colour you'll end up with a light version of it. Adding the bright colour or the white until it is the shade you're looking for is easy. You'll end up with two shades of the same colour - perfect for making the new smokey pastel eye!

Here's how I blended brighter eye shades with white eye shade to create a pastel shade.


I took a darkish purple shade I bought for Winter 2008 and blended it with a white shade on a sheet of paper. Then I put the result into a small jar I had in my travel set.


I did the same with my blue eye shade to create a lighter blue shade. The new shades are quite loose so it's a good idea to put some on your sponge brush and then smudge it a little in the palm of your hand. Tap off the excess to avoid your cheeks getting sprinkled with eye shade.


I'll also make a post on how I do the smokey pastel eye for summer 2009, using these new lighter shades I have created for free!

Saturday, January 10, 2009

Winter vegetable soup with bacon and pesto toasts


This is a recipe for a good and filling soup you can easily make of vegetables found in your fridge. You can use the vegetables you have but you should include onion and carrot and at least two more types of vegetable. So invite someone over and enjoy a good conversation over good and healthy food that won't break the bank.


I used the following ingredients (for 2 people):

Vegetable oil for frying
1/2 onion
1/2 chinese garlic
8 strips of lean bacon, sliced
1 big carrot
1 potato
1/3 red pepper
2 stock cubes
50 g / 2 oz pasta
salt and pepper


For the pesto toasts:

3 bread slices
2 tablespoons pesto
grated cheese (preferably parmesan if you have it)


1. Slice the onion and garlic and fry for 5 minutes, until just softened.


2. Dice the carrot, potato and red pepper.


3. Add the carrot, potato, red pepper and sliced up bacon and stir-fry for 3 minutes. Pour 1,2 liters / 2 pints / 5 cups of cold water over the vegetables and add the stock cubes. Cover and let it simmer for 30 minutes.


4. Add the pasta and cook as long as instructed on the package.


5. Meanwhile, spread the bread slices with pesto and sprinkle grated cheese on top. Brown lightly under a hot grill. Season the soup to taste - be careful with the salt as the bacon and stock cubes can make it salt enough alone. Be generous with the pepper.


Place the pot on the table for that rustic feel and enjoy the long, dark evening having inexpensive and tasty food and good company. Good luck!

Do you have a great, healthy and inexpensive recipe? Email me!

Make your own jewelry


A great way to freshen up your wardrobe is some new jewelry. Why not spend an hour or two making some great new pieces to wear with your old outfits? If you haven't made your own jewelry before don't rush out to shop for supplies just yet. The whole point is not spending money on it, right? So go through your jewelry box and your stash for cheap junk pieces. Are any broken? There might be old gifts in there that you never wore because you don't like them. Maybe you even find jewelry you like but haven't worn in a while. Now's the time to bring everything out into the light.


Those forgotten pieces you actually like - put them somewhere you'll notice them and imagine one outfit that works with each one. Now you even know what to wear in the days to come!


Now it's time for a make over of your broken and ugly pieces. If you already have supplies like beads or earring hangers, incorporate them. The easiest to make are beaded bracelets and neclaces. Earrings are also quite easy but may require a set of pliers for assembling them. Borrow a small one if you don't have it - roundnosed ones are good but others work as well.


Take the cheap, broken and ugly pieces and take them apart. Now you're ready to make yourself some nice, new pieces. Experiment! Parts from different necklaces and earrings can work amazingly well together! The necklace pictured above are an old chain with a piece of a Forever 21 earring where I've lost the other one. Here's three pairs of earrings I've made using pieces of old jewelry along with some beads I already had laying around:


Have fun and send me pictures of your homemade new jewelry - I'll post them here on the blog.